Service discovery, configuration management with Consul
27 Aug 2016If you have a reasonably growing setup of services then you would already know what kind of hell configuration management becomes. Let me give an example. Suppose there are three services A, B and C which depend on two redis instances 192.168.1.1:6379, 192.168.1.2:6379 and a postgres instance 192.168.1.3:5432 then your configuration for the three services would look something like this:
[Redis]
	cacheA = 192.168.1.1:6379
	cacheB = 192.168.1.2:6379
[Postgres]
	mainDb = 192.168.1.3:5432
...
Now, add to this the fact that services could be concurrent and running on multiple servers behind some load balancer i.e. A is not one single physical server (or VM) but multiple i.e. A1, A2, A3 and similarly B is say B1, B2 and C is say just C1.

So probably you already see the problem. If we have some trouble with redis cacheA and we have to replace this instance with another one say 192.168.1.4:6379 then we essentially have two options:
- Manually ssh to each of the running instances (i.e. A1, A2, A3, B1, B2, C1), make the configuration change and restart or reload the service.
- Better - make the change in configuration in the code and redeploy the services on instances using the continuous integration system you’re using (jenkins?).
The second of the above two is less painful but is waste of effort if this switch to alternate redis is temporary. It also takes considerable effort in terms of making change to code on all three repositories (A, B and C), building them via continuous integration system and deploying. It also takes considerable time.
A related problem to configuration management is Service discovery. Let’s take for example following nginx configuration which defines a server that is reverse proxy to few backend instances of services.
upstream backend {
    server backend1.example.com weight=5;
    server backend2.example.com;
    server backend3.example.com;
    server backup1.example.com  backup;
}

server {
    ...
    location /v1/awesome/service {
        proxy_pass backend;
    }

}
Nginx is awesome in distributing load on the site amongst the instances backend1, backend2 and backend3 in weighted round robin fashion. But how do we deal with servers which are down? Suppose backend2.example.com goes down - we would ideally want to remove it from the configuration immediately making it look like:
upstream backend {
    server backend1.example.com weight=5;
    server backend3.example.com;
    server backup1.example.com  backup;
}
...
Also, as soon as the service backend2.example.com is online again, we should add it to the backend:
upstream backend {
    server backend1.example.com weight=5;
    server backend2.example.com;
    server backend3.example.com;
    server backup1.example.com  backup;
}
...
Do we have a solution? Actually, there are many solutions for this problem. One of them is topic of this post.
consul.. !
Consul is a very simple service discovery and configuration management solution. This means it can store configuration data or rather any kind of key-value data. It can also maintain services information i.e. services can register and deregister with consul. Consul provides HTTP and DNS APIs for service discovery. It is distributed, HA and datacenter-aware.
The last property is particularly useful - if you have multiple data centers (multiple availability zones in AWS or may be a DC from AWS and another on from Google or Alibaba) then you can have a consul cluster on each of them which can contain cluster specific configuration (key value stores, service information) and each of those clusters can be made to be aware of the other. As needed configuration can be replicated too across data centers.
Consul is written in go and hence is available as a native binary. It is in the same league of softwares as etcd, zookeeper etc. (in terms of functional usage) but I think it is much simpler for deployment and usage.
Setup
You can play with consul by following this quickstart guide. For production deployment you can use this awesome guide for production setup of consul on Ubuntu (other guides also available there).
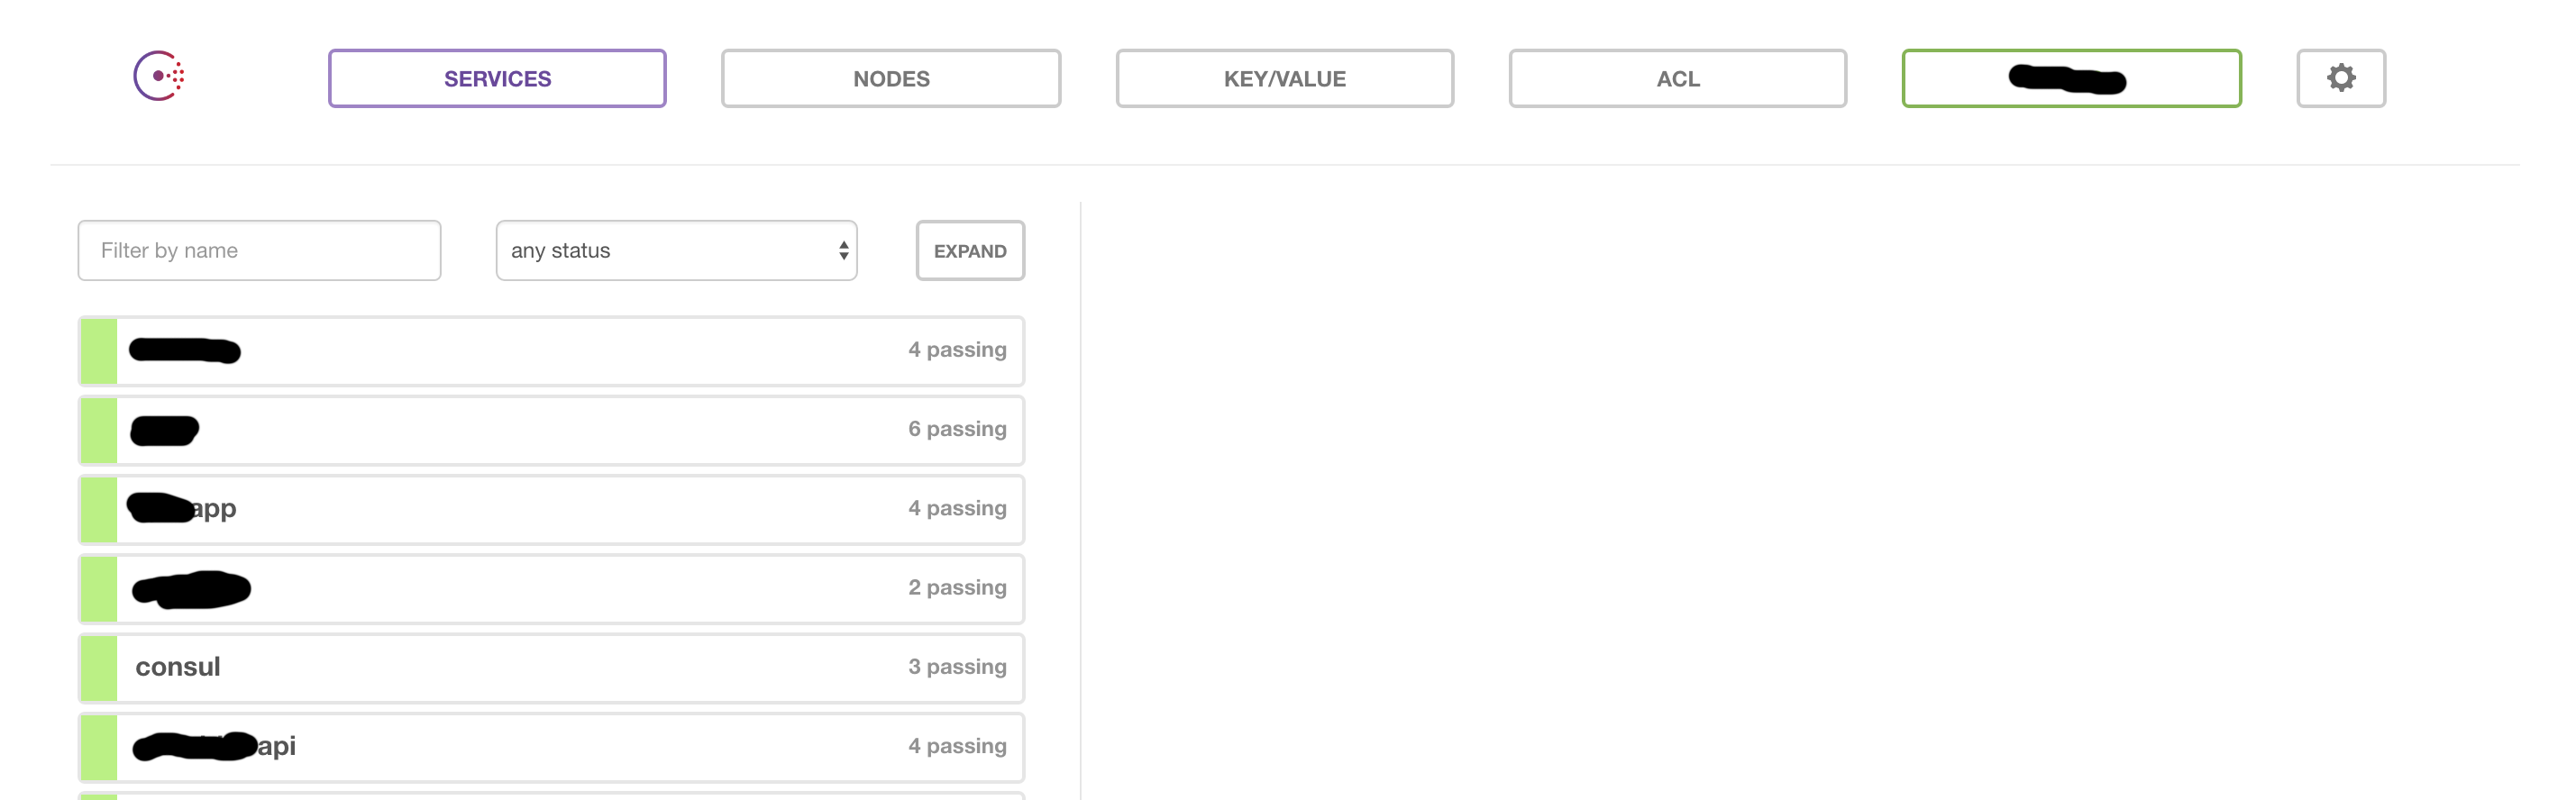
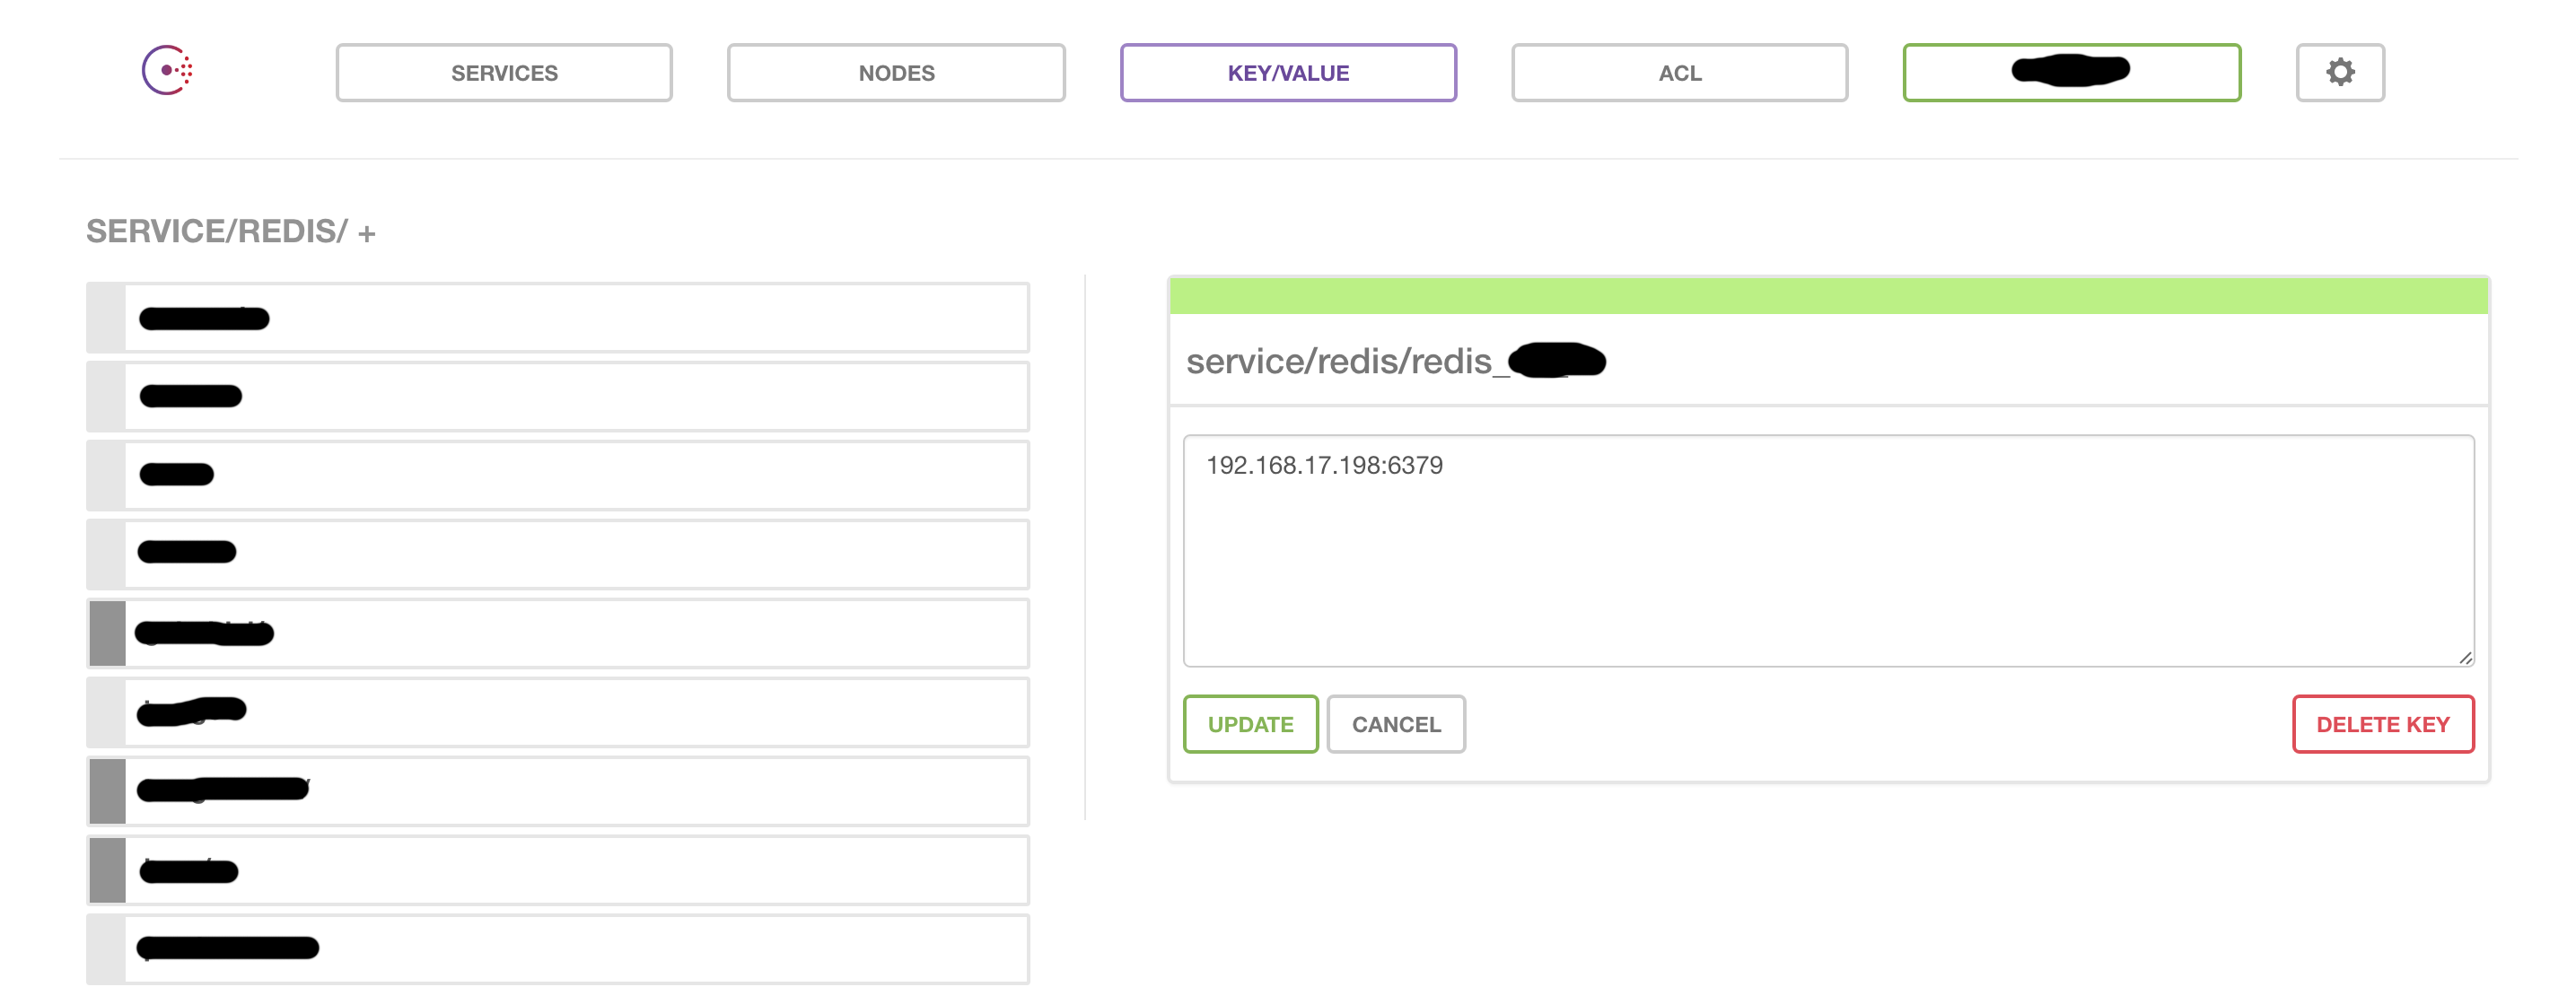
As part of consul cluster setup you will also setup consul Web UI which is the interface to list all services registered with consul, how many nodes under each of the services are running successful (‘passing’ or ‘failing’), all key values (complete CRUD for these and hence you can create, modify keys from the UI itself). Following are the screenshots for web UI (services and key values):
Consul-template
Now, that you have the cluster ready and populated with configuration data (key values) that you would want to refer to from apps - how really do you use these. Here comes consul-template - another native binary produced from the go code. From it’s read me:
This project provides a convenient way to populate values from Consul into the file system using the consul-template daemon. The daemon consul-template queries a Consul instance and updates any number of specified templates on the file system.
and ..
As an added bonus, consul-template can optionally run arbitrary commands when the update process completes.
Configuration Management
So - let’s get back to our examples above. To recap, we had three services A, B and C. Each had a configuration referring the two redis instances cacheA and cacheB.
With consul:
o. you replace the fixed configuration file in your code:
file: app.prod.ini
[Redis]
	cacheA = 192.168.1.1:6379
	cacheB = 192.168.1.2:6379
[Postgres]
	mainDb = 192.168.1.3:5432
with a consul template file:
file: app.prod.ini.ctmpl
[Redis]
    cacheA = {{ key "service/redis/cacheA" }}
    cacheB = {{ key "service/redis/cacheB" }}
[Postgres]
    mainDb = {{ key "service/postgresql/mainDb" }} // ignore username, password etc.
o. you install consul-template on each of those instances where the services A, B and C are running.
Note that this is a one-time investment and things will be even easier if you are using some automation tool like ansible or cloudformation (or chef, puppet). If you aren’t using any of these and still setting up every new server by hand - you should try one of these - my current favorite is Ansible.
so, now A1, A2, A3, B1, B2, C1 all have consul-template installed. Create an upstart for consul-template in which you run it as a daemon like following:
$ /usr/local/bin/consul-template -consul "<__ONE_OF_CONSUL_NODES_IP>:8500" -template="/etc/appA/app.prod.ini.ctmpl:/etc/appA/app.prod.ini" >> /var/log/consul.log 2>&1Your apps will be responsible for upstart scripts in this case and will be installed on deployment.
o. Now, when your redis instance cacheA goes down as we assumed in our hypothetical scenario above and you have to replace it with 192.168.1.4:6379 you simply need to go to consul web UI and update the key service/redis/cacheA to 192.168.1.4:6379 and consul-template which is running as a daemon will update the configuration instantly. Consul-template takes more arguments and you can write better command line by using config instead of -consul and -template as mentioned above. In the config format you can specify how to reload your app after config update happens. You can read more about it on the consul-template readme. Btw, you just saw how automated configuration management now is & you’re done!
Service Discovery
A service is registered with consul cluster by running consul in client mode and keeping some configuration about the service in consul configuration directory. Alternatively, we can also use consul HTTP API for registering a service. You can get a comprehensive documentation on the consul website.
file: /etc/consul.d/redis_cache_a.json
{
  "service": {
    "name": "redis-cache-a",
    "tags": ["master"],
    "address": "127.0.0.1",
    "port": 6379,
    "enableTagOverride": false,
    "checks": [
      {
        "script": "/usr/local/bin/check_redis.py",
        "interval": "10s"
      }
    ]
  }
}
There are few things here to note. We can specify a custom check script which is health checker of the service. If this script fails then consul marks the node as failed or service as down. You can also use following instead of a bash script:
{
...
  "checks": [
    {
      "tcp": "127.0.0.1:6379",
      ..
    }
  ]
..
}
This basically checks TCP connection on the specified port. There is more comprehensive list of possible checks in docs.
Other thing to note is the name of the service - this is an identifier of the service and hence it should be chosen as service identifier. It is recommended though to keep it readable and easy to remember. If your service A has a codename e.g. some greek god (what else?) like zeus then you can use that here.
Once your service is registered with consul, you can check it on both HTTP and DNS interface. Let’s see how it is to check it on DNS interface using dig unix utility:
$ dig @127.0.0.1 -p 8600 redis-cache-a.service.dc1.consul. ANY(dc1 is the datacenter name for consul)
Once this is setup and your services are registered you can use consul-template again to generate nginx configuration file based on which services are alive.
file: awesome-service.awesome.net
upstream backend {
    server backend1.example.com;
    server backend2.example.com;
    server backend3.example.com;
}

server {
    ...
    location /v1/awesome/service {
        proxy_pass backend;
    }

}
file: awesome-service.awesome.net.ctmpl
upstream backend {
{{range service "web@dc1"}}
server {{.Address}}:{{.Port}}{{end}}
}
server {
...
location /v1/awesome/service {
proxy_pass backend;
}
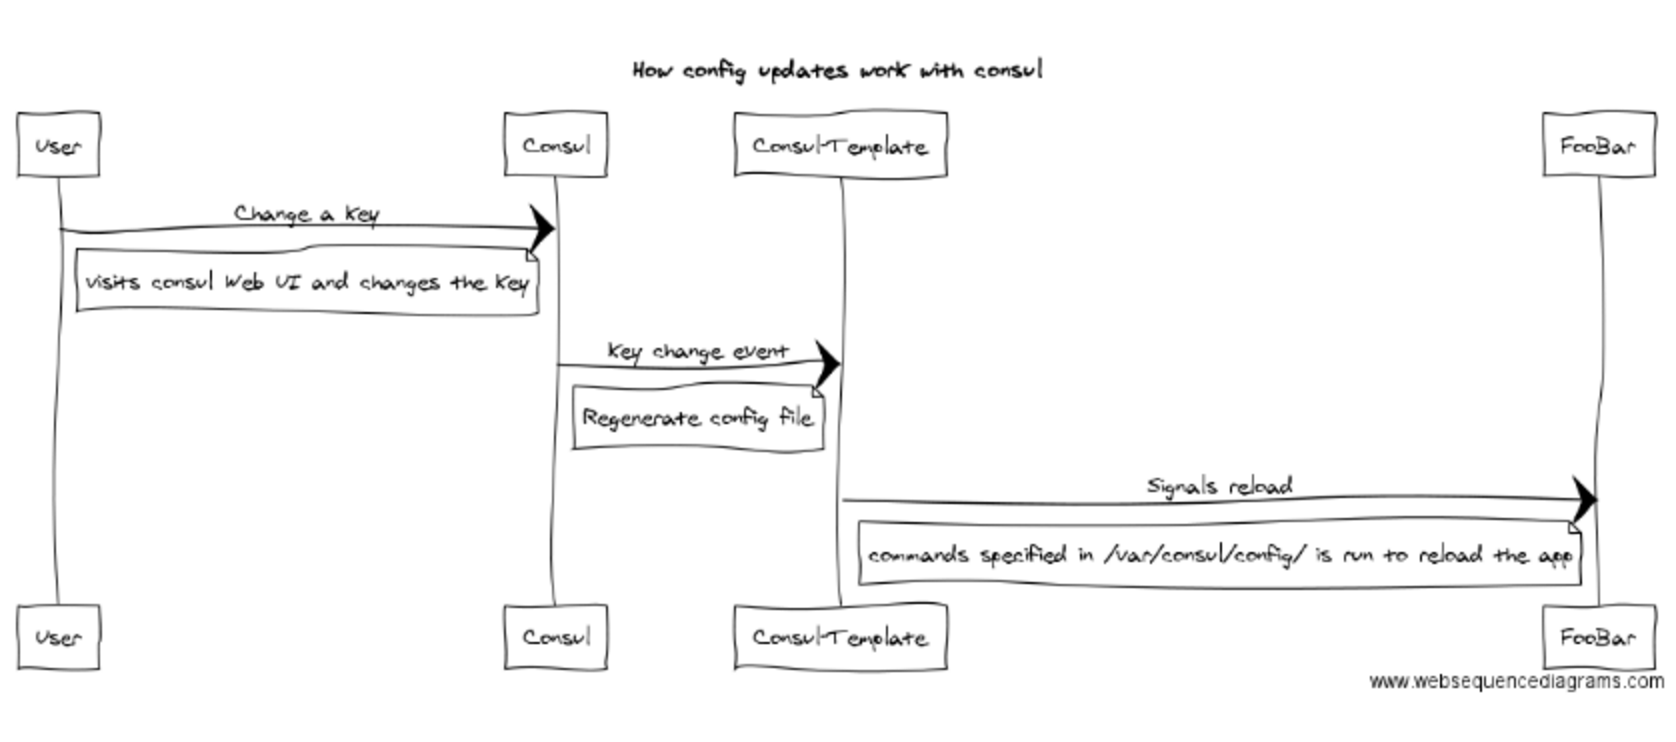
}Consul returns, by default, only healthy services. You just saw how it can completely automate your configuration management and service discovery. Following is a sequence diagram of how the config changes take place:
I have just touched the tip of iceberg with respect to the possibilities with consul - an introduction. If you aren’t tied up to another configuration management solution do give it a try.